31 August 2008

Alice in Outlines

Here is a scan of a work in progress (you can click to make it larger, if you like). I took a favorite illustration from Alice in Wonderland and attempted to turn it into a silhouette/paper cut as best I could.

This is only my third attempt at scherenschnitte, so I'm pretty happy with the results, although I wasn't quite sure what to do with her eyes. I may just keep cutting away.

A Belated Friday Finds: Bergman's Bear

I neglected my Friday Finds this week . . .

Can I just say that I lust after all the little paintings by Bergman's Bear? The northern New Englander in me feels right at home staring into these imaginary landscapes. I want a whole wall of them.

I picked up a few supplies today for an exciting project. It's an extension of this little experiment and this old love. Hopefully I'll be posting the results in a few days!

30 August 2008

27 August 2008

Shop Update: Spelling Bee Buttons


I made these from an old 1920s grammar textbook that a high school library was going to toss out. I love the randomness of the word lists--- they remind me of ridiculous found to-do lists and modern poetry.

You can get them as either pinback buttons or magnets here.

A Menagerie Manifesto

I've posted several times about the book The Boss of You: Everything A Woman Needs to Know to Start, Run, and Maintain Her Own Business. It really is an inspiring book with a wealth of information, and you can read my previous posts about it here and here.

One of the exercises the book suggests is drafting a mission statement to help you articulate and define what your business is about. While I actually drafted this back in May (with the emphasis on
draft), I've hesistated to share it publicly. Then I woke up this morning, reread it, and said, heck, why not?

Here it goes:

We at Paper Menagerie believe that buying handmade is a beautiful and revolutionary act. We believe that humor and prettiness can coexist. We believe that the objects you treasure, the gifts you love to give and receive, should be as unique as you are. We believe in pots of Earl Grey tea, warm brownies, and homemade soup, in that order. We believe in dogs on the couch, in finding the perfect in the imperfect, in making the old new, and in using what you've got. We believe that eyes and minds and hands make the world a more interesting place to be.

A bit nervewracking to put a draft out there, as I'm not entirely happy with it, but I think sharing your vision is good business practice. If anyone else has a draft, I'd love to read it!

24 August 2008

Alice, Again

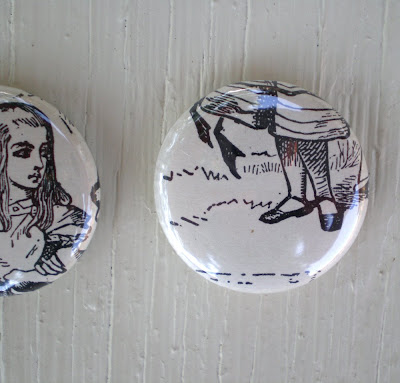
I have an old, barely salvageable 1900 edition of Alice in Wonderland that was part of one of my very first Gocco experiments--- printing John Tenniel's famous illustrations over the text (you can see that project on my Flickr page).

I've been hanging on to some torn pages from the book that I could not print on, but loved the illustrations all the same. A few days ago I made them into buttons, now available in the shop.

22 August 2008

Friday Finds: Hermes Typewriter


I don't think I can explain how badly I want this vintage Hermes typewriter. From Modish Vintage.

Beatrice Coron


I really must apologize for the lack of posts lately. You know how life gets in the way sometimes? I've been super busy with everyday tasks and some exciting news that I will share soon . . . just not yet.

As mentioned previously, I've been very interested in intricate papercuts lately, and came across artist Beatrice Coron thanks to decor8. I thought I'd share a few pieces of Coron's work here.

I've attempted two papercuts myself on pages from old magazines, and was pretty pleased with how the first one came out. I'd like to start creating my own patterns and designs as the next step in this little experiment.

15 August 2008

Shop Update: Blown Buttons

I have a total weakness for blue, and a total weakness for black-eyed Susans. Part of me really wants to keep this set.

Available in the shop.

Friday Finds: Lala's Pequenos

I feature other independent businesses and Etsy shops on here occasionally, but I thought I'd make it a more regular feature with a new segment called "Friday Finds."

Alessandra is the creative force behind Lala's Pequenos, which focuses on handmade clothing for children. Her clothes seem new and fresh, but still for children, and I especially adore the way she combines bolder Batik prints with more traditional fabrics like white eyelet. Darling!

13 August 2008

Shop Update: Llama Llove

If you liked the cards in the Gocco tutorial below, they now are available in the shop.

Basic Gocco Tutorial

I know there are a lot of great Gocco tutorials out there already (and I know this because I read many of them), but since so many people continue to ask me what a Gocco is and how it works, I thought I would do my own tutorial while I printed up some new cards today. If you need an even more basic overview of what Gocco is, I recommend this timeline on the Save Gocco! site.

I start by using vintage imagery and editing it in Photoshop, which isn't shown here. Instead, we'll start with the actual printing process. You will need a carbon-based photocopy of what the design you want to print. Many people draw their own designs with carbon pens, too.

First, slide the blue filter screen into the window of the Gocco. This filter prevents too much carbon from sticking to your master and results in cleaner, more precise prints. You can also opt to let their photocopies dry for 24 hours, and then iron them to remove excess carbon. Next, slide the actual high-mesh master screen into the window. The screen side, rather than the smoother mylar side that can be peeled away, should face the grey grid pad.Make sure the screen locks into place by checking the tabs at the top.After the filter and master are in place, place your image on the grid pad. The stickiness of the pad will hold an image in place, but I recommend placing a piece of white cardstock behind the image. Otherwise, the grid pattern from the pad tends to burn onto the master and can show up on your prints.Also, use the lines on the grid pad to make sure your image is straight, especially if it contains any text.
Take one final peek through the window to ensure that it is lined up correctly.Now you can screw two flashbulbs into the yellow housing unit.Slide the housing unit onto the top of the Gocco, making sure that the metal tabs come in contact with one another. This is how the bulbs will flash and the image will burn onto the master.Now press down on the front handle firmly and evenly, with both hands, until the bulbs flash. Do not look directly at the yellow housing unit as you are doing this; it will hurt your eyes! Look up and press until you hear the bulbs "pop." You can remove the housing unit, but do not unscrew the bulbs yet. They're very hot! Just set them aside and throw them away later.When you lift up, you will see that the photocopy of your design is now burned to the master.
I used to peel the photocopy off immediately to check that the image had burned correctly, but now I just gently inspect the corners. If you leave it on, it makes it much easier to ink your master accurately. Remove your master and peel back the mylar cover:Since this is a two-color design, I apply the ink blocking first. Ink blocking can be cut into self-adhesive strips and applied to your master to keep the colors separate.Once you have the ink blocking in place, squeeze ink directly onto the screen. I like leaving the burned photocopy on the screen for these steps because it helps me see the design and apply the ink more accurately.Once you have the entire design inked, you can slide the master back into the Gocco the same way you did when you burned the screen.I always test print on a piece of scrap paper first. Press down with both hands firmly and check that your image is printing evenly. If not, remove the screen and apply ink where needed.If you are happy with the print, you can place it in the drying rack. Be sure to leave enough space between prints on the rack to avoid smudging.Continue merrily on your way. You can likely get up to 80 prints without having to re-ink the screen, depending on the design.

A Balancing Act

Whew! I've been quite busy here, though it may not seem like it due to the lack of posts.

For those of you who don't know, in addition to our recent move, I'm making the transition from a full-time teaching job (which I enjoyed, but constantly bemoaned my lack of time to create) to a part-time job at an educational nonprofit. This means that my new, official pursuit is Paper Menagerie. This is something I've been really scared to do for a long time, but also something I've felt the drive to try. Billy has been incredibly supportive, and I'm not sure I would have made this jump without his encouragement.

There are quite a few things in the works. I just completed some more custom work for a wedding. In September, I'll be in Etsy's cooperative ad in a favorite publication of mine, BUST magazine. In October, we'll be traveling to Austin, Texas for Bazaar Bizarre/Maker Faire. While I did quite a few shows during my time in Boston, this will be my first large-scale show, and I am very excited.

Here's where the "balancing" piece comes in: How does one balance creativity and business? I certainly go through spurts where all I want to do is create, and spurts where, as a one-woman operation, I have to commit the majority of my time to promoting, processing orders, bookkeeping and the like.

How do others handle it? Do you have a schedule you stick to? Have you made the conscious decision to keep creativity and business separate? Do you continue to commit time for personal projects? Do you have an everyday routine, like a sketchbook, that keeps the juices flowing? I'd love to hear from others about this!

{I thought the picture above was fitting. I see between two and three hot air balloons on any given morning here.}

06 August 2008

Shop Update: Jane Austen Notebook

The Jane Austen Moleskine notebooks are back, and now in kraft and black. I'm happy to be making these again. If you like, you can pick one up here.

Look for the black and silver version, as well as some lux planners, in the coming days.

Tools of the Trade: Quick Gocco tips

I spent this morning working on a little Gocco project while the power was out, which got me thinking about some tools of the trade. I know that Gocco has piqued a lot of interest in recent years, and in addition to an earlier review on The New Gocco Guide by Claire Russell (and despite the news that Gocco production is ceasing again), I thought I'd share some quick tips.

The thing I really like about Gocco is its unpredictability and imperfection. It leaves a lot of room for experimentation, and through my experiments, I've come up with three indispensable tools:
  1. Credit and Used Gift Cards. You know those credit card offers you get in the mail, with the pesky, non-recyclable fake credit cards? Save them to scrape and redistribute ink on the Gocco screen. Not only is it putting all those junk mail inserts to use, but it helps save on ink and prevent uneven, blotchy prints as well. Simply open the screen, run the card over the mylar sheet (not the burned side), and redistribute the ink onto the burned screen in places that are not printing consistently. Be sure to do a test print on scrap paper before returning to your intended materials.
  2. Scotch Tape. Sometimes a photocopy will have some stray carbon on it that will burn as little "pin holes" and will show up on your print. Rather than burning a new screen or scraping the ink off that spot, simply slap a little patch of scotch tape over the pin hole on the side of the screen that faces the mat. It stops the ink from coming through, but you can still see what you're doing.
  3. Duct Tape. When the grey grid pad that keeps your print in place loses its stickness (and if you do a lot of printing, it will), wrap some duct tape around your fingers and press it over the pad repeatedly. It will remove any lint and revive the pad's adhesive properties, and you'll get much more mileage out of your Gocco parts.
I'd love to hear from other Gocco enthusiasts about any tips or tricks they have discovered!

Wondermark

If you haven't noticed already, a lot of my Gocco work uses Victorian engravings and other images with a nineteenth-century feel. I do this for several reasons. First, my drawing skills have fallen by the wayside since high school (I'm trying to get them back). Second, these images are old enough to be public domain, are copyright free, and allow me to manipulate the original image in Photoshop, add my own text or other images, and print and sell the end result on Etsy. But the motivation isn't purely mercenary--- a few years ago, I was pursuing a PhD in Victorian literature and was convinced I would spend the rest of my days in that fabulous ivory tower, reading the Bronte sisters and writing fascinating literary criticism.

Plans certainly changed, and I'm all the happier for it, but I'm still drawn to the Victorian aesthetic, even if it is becoming less trendy.
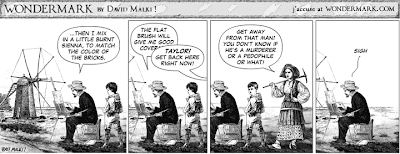
Someone recently referred me to Wondermark, comics by David Malki that use nineteenth-century engravings. I love his quirky sense of humor and thought I'd share some here ( I recommend clicking on the comics to enlarge and going directly to his site for more readable clips). Hope you enjoy them as much I as do.

03 August 2008

Shop Update: School Kid Buttons


These are made from a rockin' 1970s textbook (can you beat that yellow?). There's nothing like saddle shoes, kneesocks, and jump rope.

Available in the shop.

02 August 2008

Saturday Morning

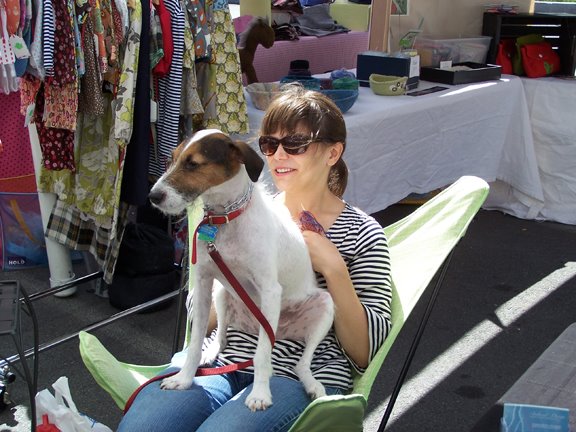
Chesney and I went to the farmers' market this morning, where he took the opportunity to try to bully every chihuahua he saw (finally dogs that are smaller than him!). A lovely old couple were selling three zinnia stems for a dollar, so I couldn't resist. I also bought lots of zucchini for a savory cheescake recipe I'm dying to try (my husband says "blech.").I'm going to spend the rest of the morning finishing up some more buttons made from vintage childrens' books. They look like candy all piled together. Yum.

01 August 2008

A Schrenschnitte Experiment


I am really inspired by all the papel de picado (pretty Mexican papercuts that are strung together to create an airy tissue paper garland) I'm seeing around Albuquerque, so I took out a book from the library and experiment with the German style of papercutting, also known as Schrenschnitte.

Not wanting to invest in any more craft supplies, I simply traced a pattern and ripped out a pretty photograph from an issue of Martha Stewart Living. I really like how each side has a different feel to it.

I see a lot of potential here for crafting with vintage and repurposed papers, and also for all those vintage images I love--- I'm looking for some tips and tricks on creating my own patterns.
Related Posts with Thumbnails
 

blogger templates | Make Money Online